
I remember the first time Sarah and I set up my podcast space in our first apartment together.
It looked like a dodgy extension cord shop exploded.
Wires running in every direction, my laptop balanced on a stack of books, and my Blue Yeti mic sitting so low I felt like I had to do reverse crunches just to talk into it.
I still laugh a little whenever I listen back to that first recording. Let’s just say it didn’t exactly scream “professional podcaster.”
That’s when I realized getting a boom arm isn’t some “I made it as a podcast host” flex. It’s about getting your mic where it needs to be so your voice comes through clear, every time.
In this guide, I’ll walk you through exactly how to set up your Blue Yeti mic boom arm, dodge the usual mistakes (mic sag, thread issues, cable chaos), and get your sound crisp enough that you’ll actually want to listen to your own podcast.
So grab your mic, clear a bit of desk space, and let’s get you sounding like you’ve been doing this for years.
Blue Yeti Mic Arms Overview
A boom arm (or mic stand) isn’t just desk candy. It keeps your mic in the sweet spot, frees up space, and saves you from leaning in like you’re telling ghost stories into your laptop.
But here’s the catch: The Blue Yeti is a bit of a unit. Not every arm or stand can hold it without slowly sinking mid-recording.
Here’s a quick comparison of the five most trusted picks for the Blue Yeti:
| Stand | Best For | Works With | Weight Support | Clamp Type | Cable Management | Price |
| Logitech Compass | Professional streaming and podcast studios | Blue Yeti, Yeti X | Up to 2.4 lbs | Desk clamp (fits up to 2 5/8″) | Built-in channel | $129.99 |
| InnoGear Mic Stand | First boom arm upgrade from stock stand | Blue Yeti USB | Up to 4.4 lbs | Desk clamp | Cable ties included | $31.99 |
| TONOR Adjustable Desktop Stand | Tabletop setups and small spaces | Blue Yeti (with adapter) | Up to 6.6 lbs | Weighted base | Cable ties included | $34.99 |
| Auray MS-5230F Floor Stand | Standing or mobile recording | Blue Yeti (with adapter) | N/A | Tripod base | None | $31.95 |
| Neewer Low Profile Mic Arm | Low-profile setups with long reach | Blue Yeti X, Yeti, Yeti Pro | Up to 5.5 lbs | Desk clamp (fits up to 3″) | Cable clips included | $84.99 |
Talks tip: Whatever arm you choose, make sure it can hold the Yeti’s weight comfortably. If it droops, your audio (and your posture) will suffer.
Blue Yeti Boom Arm Review (Talks Top Picks)
Choosing the right boom arm or stand comes down to your space and how you like to work.
Need a quick recommendation?
Start with the InnoGear Mic Stand. It’s a solid all-rounder that handles the Blue Yeti’s weight and won’t blow your budget.
From there, whether you want a floor stand for pacing while you record, a sleek desktop option for tight spaces, or a premium arm that looks as good as it performs, I’ve picked the best options to match your setup and style.
Best floor stand
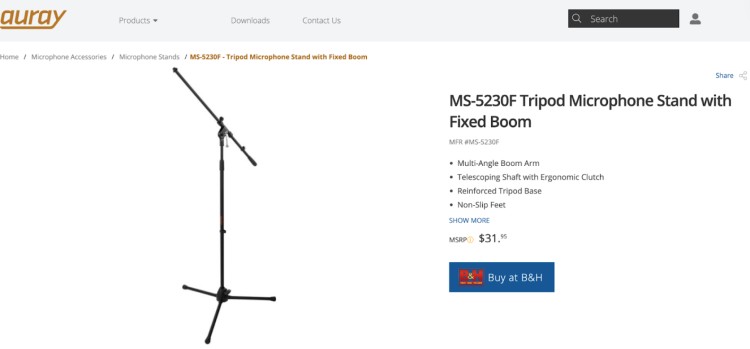
The Auray MS-5230F Floor Stand ($31.95) is your best option when clamping isn’t an option or you want the flexibility to move around. Perfect for standing streams or when your desk space is tight.
Adjustable height means you can record sitting or standing. The tripod base keeps things steady, even if you accidentally bump it mid-session.
Best desktop stand
The TONOR Adjustable Desktop Stand ($34.99) is perfect for small desks or quick condenser mic setups that call for a swivel mount that rotates 360 degrees and a weighted base that won’t tip. Ideal if you don’t want the hassle of clamps to position the mic.
The heavy base and smooth tilt help you keep your Blue Yeti Pro and other popular microphones right where you want them without cluttering your space.
Best desk clamp arm

The InnoGear Mic Stand ($31.99) is like your reliable pair of trainers: solid, comfortable, gets the job done.
It’s compatible with the Blue Yeti and Yeti Pro, clamps to your desk, moves smoothly all around, and keeps your mic steady no matter how intense your conversation gets. It also comes with built-in cable management to greatly improve your setup.
Great for most podcasters and streamers who want a reliable upgrade to their audio quality without spending a ton.
Best boom arm for Blue Yeti X
The Neewer NW-35 Suspension Boom Arm ($24.99) handles mics up to 3.3 pounds, making it a great fit for the slightly smaller and lighter Blue Yeti X.
It has strong springs, a solid clamp for desks up to 2.75 inches thick, and cable clips to keep cords tidy.
A simple, sturdy, and reliable choice.
Best premium arm
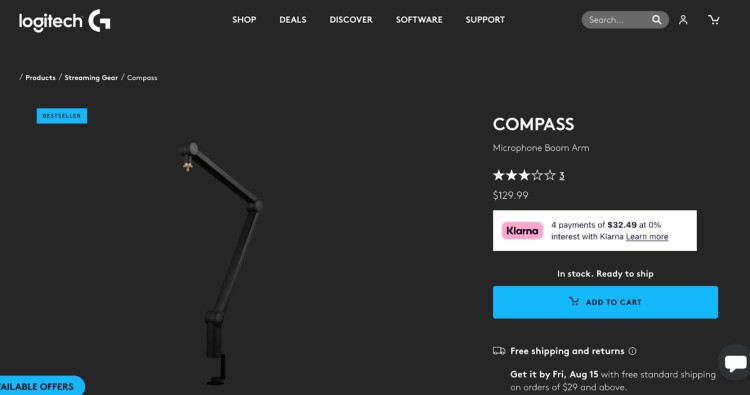
If you’re serious about podcasting or streaming and want your setup to look and feel professional and top-quality, the Blue COMPASS Boom Arm ($129.99) is easily one of the most popular Blue Yeti microphone stand options out there.
Silent adjustments, premium build, and built-in cable channels keep everything neat. Think of it as the leather jacket of mic arms. Classic, sharp, and built to impress.
How to Put the Blue Yeti On a Boom Arm
Mounting the Blue Yeti mic isn’t quite like hanging your average mic. It’s a solid, hefty beast, and the thread sizes don’t always line up.
So first, check if your boom arm includes a 3/8″ to 5/8″ adapter (that’s the little piece that makes the Yeti fit snugly).
If you don’t have one, grab it before you start. It’s usually inexpensive and saves you from a lot of setup problems later.
Once you have the adapter:
- Screw the adapter onto the end of the boom arm.
- Hold the Blue Yeti firmly by its body. Avoid touching the grille or capsule area.
- Carefully thread the mic onto the adapter by hand, turning it until it feels snug. Don’t force it. Stripped threads are a rookie mistake.
- Tighten just enough to keep the mic steady but still adjustable when you want to reposition it.
If your mic starts to sag or droop during recording, the tension might be too loose or your favourite boom arm isn’t rated for the Yeti’s weight.
Talks tip: Adjust the springs if your arm has them, or consider upgrading to a sturdier stand specifically designed for the Yeti like the Yeticaster bundle.
Blue Yeti boom arm setup
With the mic mounted, it’s time to find your sweet spot. Here’s what to focus on:
- Height: The mic should sit at or just below mouth level. Too high or low, and your voice loses clarity.
- Distance: Aim for about a hand’s width between your mouth and the mic. Closer risks muffled sound; farther loses presence.
- Angle: Tilt the mic slightly so you’re speaking across it, not directly into the diaphragm. This reduces popping sounds on plosives like “p” and “b.”
- Cable management: Run your USB or XLR cable along the boom arm, securing it with clips or velcro ties. This keeps your setup neat and avoids accidental tugs mid-recording.
Talks tip: For anyone on video calls, live streams, or recording a podcast remotely, position the arm so the mic doesn’t block your face but still captures your voice clearly.
5 Blue Yeti mic arm setup ideas

Not all types of podcasts are working out of a fully decked-out podcast recording studio. Your boom arm setup depends on where you’ve parked your mic and picking the right polar pattern keeps your sound clean.
Here’s how to make it work anywhere:
- Desk in a home office: Clamp the scissor arm to the side so it swings in front of you, then folds away when you’re done. Keep the mic just off to the side of your mouth to avoid breath pops. Cardioid keeps the focus on your voice, not your keyboard.
- Kitchen table “studio”: Clamp to the far edge so the mic’s closer to your mouth than the fridge. Cardioid mode will help cut down on the hum of appliances and any “creative” background commentary from family members.
- Closet recording booth: Mount the boom arm high so the mic hangs just below eye level. The clothes act as free soundproofing. Cardioid for solo work, Omnidirectional if you’re recording with a guest.
- Live streaming with a snack-happy roommate: Angle the mic toward you and away from the source of crunching, slurping, or general chaos. Cardioid will block most of it, but distance is your friend here too.
- Tight space or corner desk: Go for a low-profile arm that can slide under shelves or monitors. Keeps things tidy and still within reach. Cardioid for solo, Bidirectional if you’re doing face-to-face interviews with co-hosts.
Talks tip: Whatever your setup, test it before you go live or hit record. A two-minute mic check now saves you from hours of “Why does it sound like I’m in a cave?” later.
10 Benefits of Using a Blue Yeti Mic with a Boom Arm
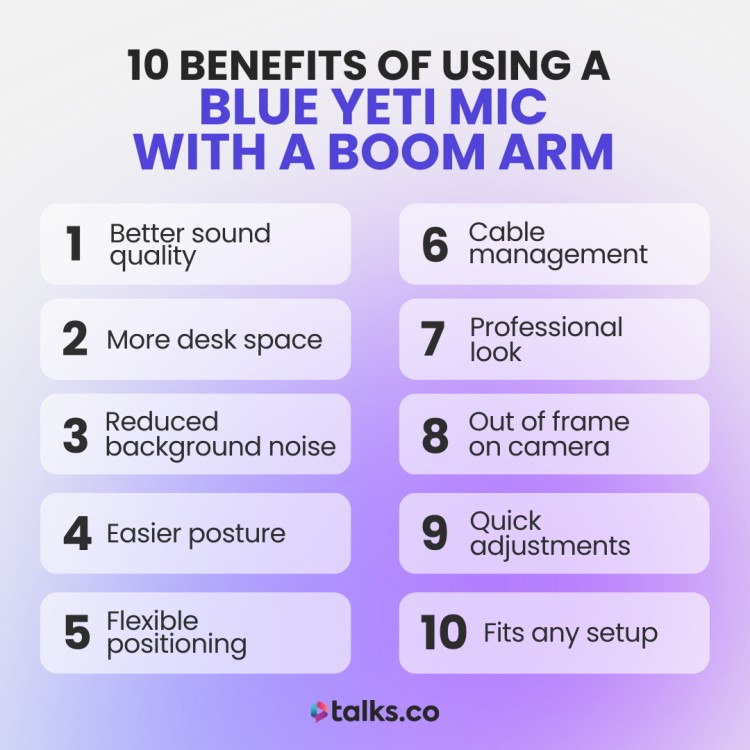
A boom arm for your Blue Yeti isn’t just a cool-looking gadget. It’s like giving your mic power steering. You can swing it into position, park it when you’re done, and keep it exactly where your voice sounds best.
Not convinced? Here are ten more reasons why it’s worth it:
- Better sound quality: Keeps your mic locked in the “sweet spot,” so your voice stays clear and even. No more drifting away mid-podcast like you’re narrating from another room.
- More desk space: Lifts your mic off the table so you can spread out your notes, sketchpad, or that dangerously large coffee without knocking into it.
- Reduced background noise: No more desk thuds when you set down a mug or type. The mic stays isolated from the chaos.
- Easier posture: Sit naturally instead of leaning forward like you’re trying to tell a secret to your laptop. Your back will thank you.
- Flexible positioning: Recording guitar one day and gaming the next? Just swing the mic to wherever you need it without a full setup shuffle.
- Cable management: Built-in clips or channels mean you’re not fighting a spaghetti mess of cords during a live stream.
- Professional look: Even if you’re in a hoodie at 2 a.m., your setup will look like you’re broadcasting from a studio for half the price.
- Out of frame on camera: Perfect for streamers. The mic stays close for great audio but doesn’t photobomb your face.
- Quick adjustments: Mid-episode guest swap? Pull the mic over in seconds without readjusting your entire desk.
- Fits any setup: From a clamped arm in your office to a floor stand next to your couch, there’s a boom arm for every recording corner even the “studio” you built in your closet.
8 Common Blue Yeti Mic Boom Arm Setup Mistakes
Most people think boom arm problems come down to “is it tight enough?” or “is the mic too far?” but the sneaky issues only show up when you hear them in playback.
Here’s what to watch for:
- Mounting the arm on your dominant side. You’ll keep bumping it with your mouse or note-taking hand. Switch sides to free up space.
- Letting the arm touch the wall or monitor. Even small vibrations travel through the arm into your mic. Keep a gap so it floats freely.
- Overextending the arm. Stretching it fully reduces stability and adds noise. Move the clamp closer to avoid maxing out joints.
- Facing the Blue Yeti logo toward your monitor. The mic picks up best from the front. Point the front at you to avoid recording fan noise.
- Ignoring spring noise. Cheap arms can twang when adjusted mid-recording. Test movement first or mute yourself before repositioning.
- Mounting on a shaky desk. Not even the best hardware like the Rode PSA1 arm can fix a desk that shakes when you type. Use a side table or more stable surface.
- Forgetting to check mic tilt after tightening. The Yeti’s weight can make it droop slightly and affect your sound. Recheck tilt every session.
- Clamping to a desk lip that’s too thin or thick. If the clamp doesn’t grip well, the arm will shift. Match your clamp to desk thickness or use an adapter plate.
Best Accessories for the Blue Yeti Microphone
The Blue Yeti is a solid mic on its own, but adding a few key accessories can seriously improve your sound and setup.
Here are the best Blue Yeti accessories that every Blue Yeti user should consider:
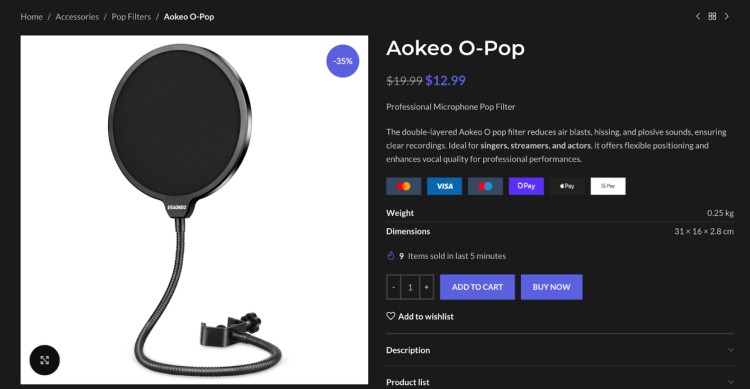
- Pop filter: Using a pop filter like the Aokeo O-Pop ($12.99) or the Auphonix Pop Filter ($11.99) cuts plosives and breath noise with its double mesh layer. Clamps easily to Blue Yeti arms and your microphone stand with flexible 360-degree positioning.
- Blue Yeti shock mount: The Heil Sound PRSM-B Shock Mount ($99) and the Blue Radius III ($49.99) are some of the more ideal Blue Yeti shock mount options for heavier mics. Using a shock mount stops desk vibrations from ruining your high-quality audio.
- Thread adapters: To fit most boom arms, you’ll need a thread adapter. The Rode Thread Adapter ($29) converts 3/8″ to 5/8″, making your mic compatible with almost any stand or arm.
- Foam windscreen: Cut down on wind or breath noise with the WindTech WS-3 Foam Windscreen ($16.95). Fits snugly over the Yeti’s capsule and other USB microphones for outdoor or drafty room recording.
- Cable organizers: Keep cables neat with DECHOUS Microphone Cable Clips ($10.89). They attach easily to any mic stand, perfect for neat, damage-free setups. Better option than rubber bands.
Not sure about everything you need? Check out my full guide on what equipment is needed for a podcast and how much podcast equipment costs.
How to choose the best accessories for a Blue Yeti (Checklist)
The right accessories can sharpen your sound and make your setup easier to use. Keep these in mind when picking accessories to improve your Blue Yeti:
☐ Compatibility: Make sure pop filters, shock mounts, and adapters fit the Blue Yeti’s size and threads.
☐ Build quality: Pick durable gear that won’t loosen or break with regular use.
☐ Functionality: Look for adjustable clamps, flexible positioning, and cable management to keep things neat.
☐ Sound improvement: Choose accessories that cut down on noise, vibrations, and popping sounds.
☐ Ease of use: Go for stuff that’s easy to set up and adjust without extra tools.
☐ Budget: Find a balance between price and quality so you don’t regret it later.
Use this checklist to get accessories that actually help you sound better and work smoother. And check out this full guide on the best podcast equipment bundles for better deals.
Support You Didn’t Know You Needed
A solid Blue Yeti mic boom arm isn’t just gear. It’s what keeps your setup clean and your sound sharp. Choose one that holds steady, fits your space, and makes recording easier. It pays off every time you hit record.
Ready to grow your podcast?
Create your free Talks creator profile to find guests who fit your show and fill your schedule with episodes people want to hear. No more chasing leads. Just great episodes made easier.
Build Your Free Talks Creator Profile Now
 + Free Intro Generator 2026")

