
Recording a podcast remotely sounds easy… until your guest freezes, the audio echoes, and your software decides to speak its own language.
If you’ve ever wondered how to record a podcast remotely or do interviews over the phone without losing your mind, you’re in the right place.
I’ve hosted and been a guest on 400+ episodes from cramped bedrooms to breezy beaches and every single one ran smoothly thanks to the systems I’m sharing here.
In this guide, you’ll get:
- The gear that actually makes a difference
- Quick prep habits to keep episodes flowing
- Step-by-step methods for recording with guests, co-hosts, or video
- Tips that make every recording sound professional, no matter where you are
By the end, recording remotely won’t feel like juggling flaming swords. You’ll know exactly what to do, what to skip, and how to get a podcast that sounds like you’ve been doing it for years.
How to Record Podcast Remotely (Quick Checklist)
Use this checklist anytime you’re about to record a remote podcast. It keeps your setup clean, your guests prepared, and your audio safe.
How to record a podcast remotely
☐ Choose your recording method: Decide on the platform or approach for remote recording.
☐ Select audio gear: Pick a mic and headphones that suit your needs.
☐ Prep your recording space: Make it quiet and free from distractions.
☐ Prep your guest: Share links, confirm tech, and ensure a smooth setup.
☐ Record and monitor: Keep an eye on levels and audio quality.
☐ Backup your recording: Always save copies in case something goes wrong.
☐ Plan post-production: Edit, clean up audio, and finalize your episode.
How to record a podcast with someone remotely
☐ Use a platform with local recording: Cleanfeed or similar to avoid glitches.
☐ Agree on gear basics: Mic and headphones for both hosts/guests.
☐ Do a pre-chat: 5 minutes to test audio and break the ice.
☐ Keep eye contact: Turn on video for smoother conversation.
☐ Clap at the start: Helps sync audio if recording separate tracks.
☐ Have a post-show moment: Thank guests and share promo materials.
How to record a video podcast remotely
☐ Use high-quality video platforms: Alitu or Hindenburg for local HD/4K recording.
☐ Light your face, not the room: Natural light, ring light, or softbox.
☐ Frame it right: Eye-level camera, clean background.
☐ Look into the lens: Build connection with your audience.
☐ Record visual extras: Separate intros or end screens for branding.
How to record a podcast on your phone
☐ Download a quality recording app: Dolby On or Ferrite.
☐ Plug in a mic if possible: Lavalier or portable USB mic.
☐ Find a quiet space: Car, hotel room, or soft-furnished area.
☐ Hold steady or clip mic: Maintain consistent distance from your mouth.
☐ Upload to cloud immediately: Backup to iCloud or email.
What Is Remote Podcasting?
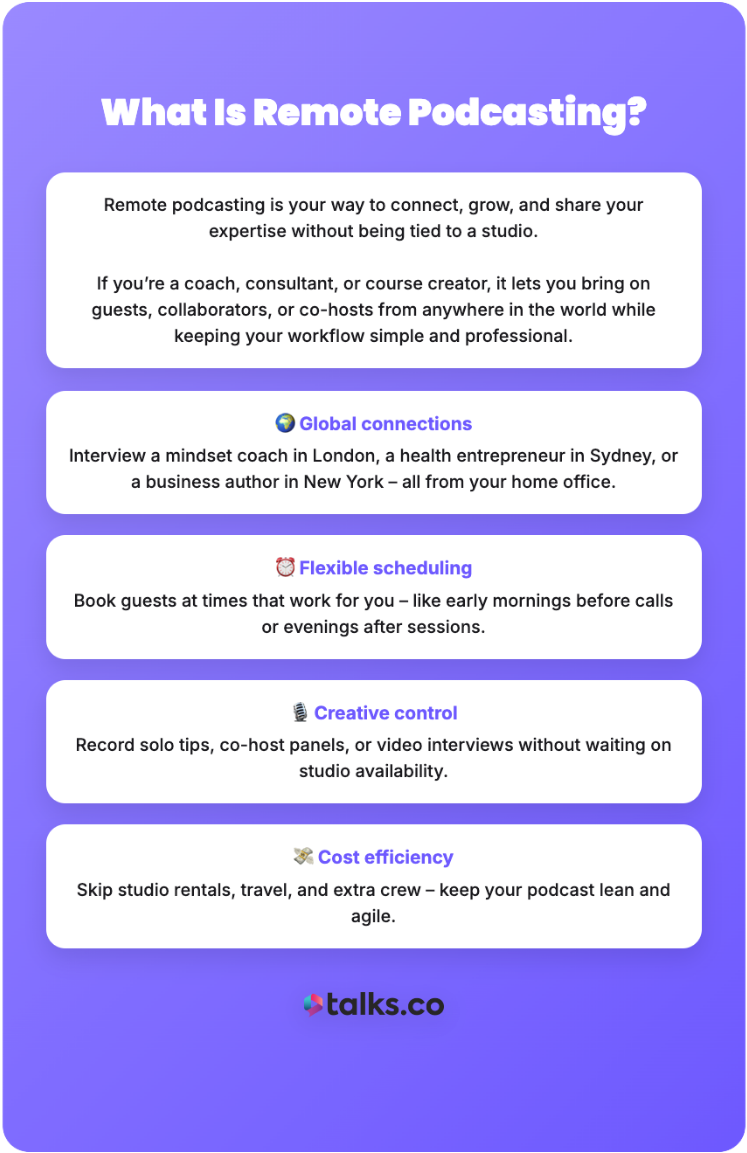
Remote podcasting is your way to connect, grow, and share your expertise without being tied to a studio.
If you’re a coach, consultant, or course creator, it lets you bring on guests, collaborators, or co-hosts from anywhere in the world while keeping your workflow simple and professional.
Key elements you get when you record remotely:
- Global connections: Interview a mindset coach in London, a health entrepreneur in Sydney, or a business author in New York all from your home office (or kitchen).
- Flexible scheduling: Book guests at times that actually work for you, like early mornings before client calls or evenings after programs.
- Creative control: Record solo tips, multi-host panels, or video interviews without waiting for studio availability.
- Cost efficiency: Skip studio rentals, travel expenses, and extra crew, keeping your podcast lean.
5 Benefits of remote podcast recording
Recording remotely isn’t just about convenience. It helps you grow your brand, build authority, and keep your audience engaged.
Here are the benefits of podcasting you get as a niche coach or entrepreneur:
- Stress-free tech practice: Try out new software, recording setups, and microphones without worrying about how much it costs to start a podcast. Experiment, learn, and level up your skills quietly.
- Unplanned creativity: Record from a coffee shop, a park, or even on travel days. Those offbeat episodes often have the most energy and personality your listeners will remember.
- Cultural insights on the fly: Interview guests in different cities or countries and naturally weave local trends, case studies, or examples into your episodes, giving your content global flavor.
- Rapid content repurposing: Pull audio for social clips, transcription for blog posts, or video snippets for reels and LinkedIn posts effortlessly. Everything feeds your marketing.
- Sneaky audience growth: Capture behind-the-scenes moments, candid conversations, or casual chats that feel authentic so listeners notice and share content more.
How to Record a Podcast Remotely
Recording a podcast remotely is a skill that turns any conversation into a professional, listen-worthy episode.
Nail the setup, the flow, and the small habits, and you’ll stop worrying about tech hiccups and start focusing on what really matters: the conversation itself.
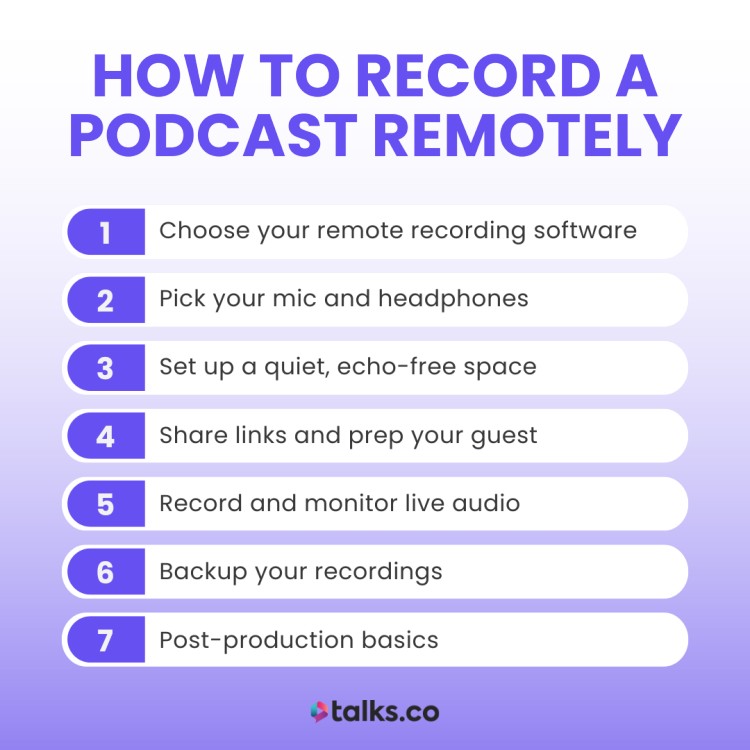
Step 1: Choose your remote recording software
Before you hit “record,” choose the right platform. The key is to pick the best software for podcast interviews that’s easy to use and provides good audio and video quality.
- Riverside.fm: Studio-quality audio and video, even with unstable internet. It records each participant locally, then uploads high-resolution files for editing. Great for interviews and video podcasts.
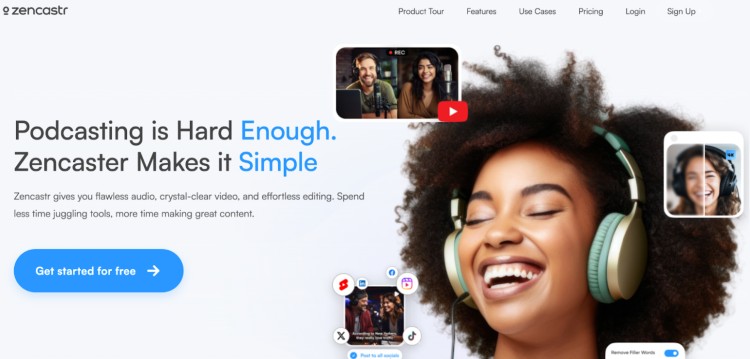
- Zencastr: It’s like a Swiss Army knife. You can record high-quality audio, get automatic backups, and even post-production tools. It’s your all-in-one podcast episode recording and editing software.
- Descript: A versatile tool for both recording and editing, Descript allows you to edit your podcast by editing the text transcriptions.
Step 2: Pick your mic and headphones
We talk about mics and headphones like they’re just tools… but really, they’re an extension of your voice.
Think about it: Your mic is how your audience connects with you. Your headphones are how you connect with yourself in the moment.
Here’s what I swear by:
- Blue Yeti: A versatile mic that captures great sound quality, especially for beginners. It’s got that “plug-and-play” feel.
- Audio-Technica AT2020: An affordable professional-grade mic with clear, crisp audio every time you record a podcast interview.
For headphones, you can’t go wrong with:
- Audio-Technica ATH-M50x: They’re built for comfort and precision when you record a high-quality podcast. Offers excellent sound isolation and clarity.
- Sony MDR-7506: The go-to for sound pros. You’ll feel more confident knowing you’re hearing the best audio possible.
Step 3: Set up a quiet, echo-free space
The space around you? It’s not just a background; it’s an essential part of your podcast. A quiet, echo-free space sets the stage for great audio.
Here are the best practices for remote or long-distance podcast recordings I recommend:
- Soft furnishings like pillows, blankets, and couches. They absorb sound and block out distractions. You don’t need to overthink it; a few simple adjustments can make a huge difference when you record the call.
- Invest in foam panels or a portable sound booth. It’s an easy way to reduce sound reflections and keep the quality of your remote audio clean and crisp.
- Isolation shields. Think of them as your personal sound cocoon. They’ll help keep things focused on your voice, not the environment around you whenever you record an interview.
Step 4: Share links and prep your guest
Inviting a guest is more than just sending a link. It’s an invitation into your world, your space, your energy.
Here’s how you prep:
- Share that link ahead of time. Give your guest the time and space to feel comfortable with the tech.
- Walk them through the process. Show them how to troubleshoot if something goes wrong. The smoother their experience, the better your podcast will flow.
- Ensure their space is quiet. Make sure they’re set up for success, just like you are.
- Check their internet connection. It’s worth the extra few minutes to ensure they’re good to go and the quality of the recording stays crisp.
Step 5: Record and monitor live audio
This is the moment you’ve been preparing for. The record button is hit, and you’re ready to go.
Make sure you:
- Monitor the levels. You’ll have peace of mind knowing your levels are just right.
- Stay aware. Pay attention to the audio while you’re recording. The more you listen, the more in-tune you’ll be with your sound.
- Your levels should sit between -6dB and -3dB. This ensures your audio is loud enough to hear clearly but not so loud it distorts. Too low, and you sound distant. Too high, and it’s distorted.
Step 6: Backup your recordings (always!)
You’ve done everything right, and the last thing you want is for something to go wrong. That’s why backing up your recordings is a non-negotiable.
Here’s how to keep your recordings safe:
- Cloud Storage: Dropbox or Google Drive. They’re reliable, and you can access your recordings anywhere.
- External hard drives: Always have a second backup. It’s like insurance for your work. You’ll be glad you took the extra step if anything goes wrong while you record interviews.
Step 7: Post-production basics (editing + audio cleanup)
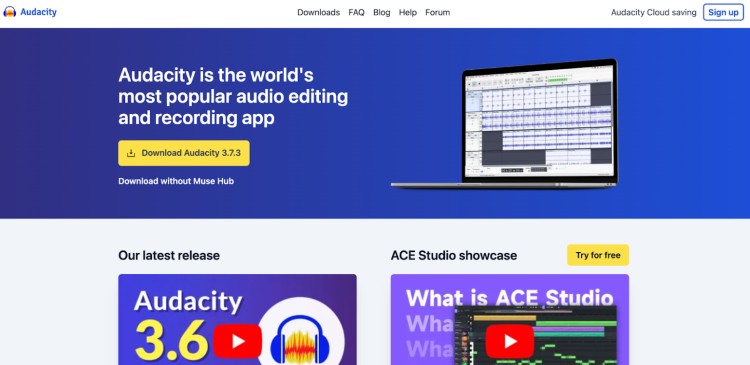
More than just trimming the fat, editing your podcast is how you shape your story. You’re not just fixing mistakes; you’re making sure your podcast sounds its best.
Here’s how to do it right:
- Audacity: Free, simple, and it gets the job done. Perfect for removing background noise, cutting filler words, and exporting your episode quickly.
- Adobe Audition: If you want precision over every detail and high-end production value, this is for you. Use multitrack editing, advanced noise reduction, EQ, and compression to polish your podcast
- Reaper: Offers multi-track recording, customizable effects, and batch processing. Great for handling multiple episodes or experimenting with layered audio and creative sound design.
How to Do a Podcast Remotely (Easy, Fast & Free)
Recording a podcast remotely used to feel like you needed a tech degree and three backup plans.
Now? You can run a whole show from your laptop without overthinking a single step.
Below, you’ll find the easiest, best, and fastest ways to record your podcast online, organized by what you need, your setup, and how you like to work.
Easiest way to record a podcast: Zoom
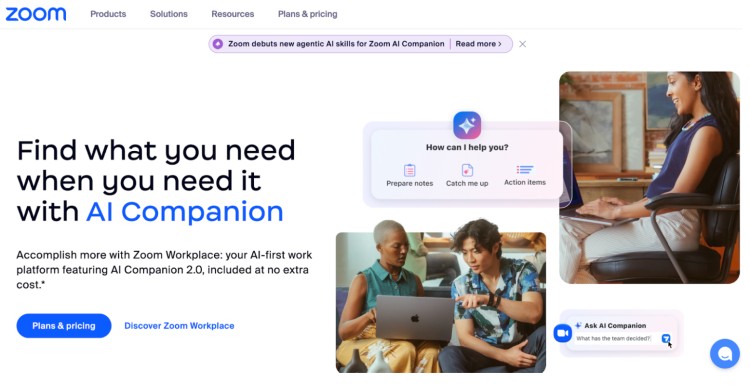
If you’re looking for the easiest way to record a podcast remotely, Zoom is the answer. It’s a simple and reliable video conferencing software.
Most guests already know it, and you don’t need to be an audio whiz to get started.
Why Zoom?
- Super simple setup: If you can start a Zoom call, you can use Zoom to record a podcast. No complicated tools or learning curve when you use remote recording software like this one.
- Decent audio and video quality: Good enough for interviews with clients, co-hosts, or industry experts, especially if you’re just starting out.
- Widely accessible: Most of your guests will have Zoom installed, so there’s no learning curve for them either.
- Affordable: The free plan on Zoom lets you record one-on-one audio, and the paid versions are affordable if you’re doing group interviews and need to record their audio remotely.
How to get started:
- Create an account: Sign up for Zoom if you haven’t already.
- Schedule a meeting: Set up a meeting for your podcast recording and share the link with your guests.
- Record: Hit record when you’re ready, and Zoom will handle the rest, saving each participant’s audio and video files separately.
- Download: After the recording, Zoom will give you the files you need to edit your podcast.
It doesn’t get much easier than that. Zoom gives you everything you need to record your podcast without any complicated steps.
It’s just like a regular video call, but with better audio quality.
How to record a podcast remotely for free: Google Meet
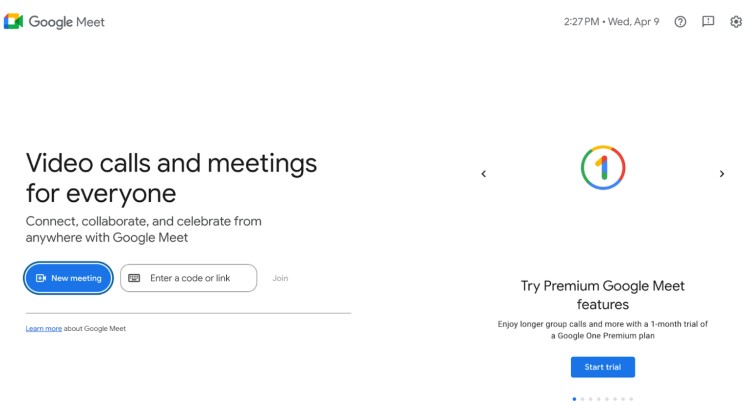
Google Meet is a simple, free option for recording podcasts, perfect if you and your guests already live in the Google ecosystem.
One-on-one interviews? Easy. No downloads? Check. A browser is all you need.
Why Google Meet?
- Straightforward setup: If you already use Google services, setting up a meeting in Google Meet is quick and familiar.
- Free for one-on-one calls: Google Meet’s free plan works well for solo or one-on-one interviews.
- No time limits: Unlike some other free video conferencing tools, Google Meet doesn’t limit the length of calls for a one-on-one recording session so you get the best possible content without getting cut off.
- Decent audio and video recording quality: Google Meet lets you record audio and video with stable quality, making it a solid choice for remote podcasting.
- Guest-friendly: Your guests don’t need to download anything. Just send them the meeting link, and they can join the call recording via their browser or through the app on their phone.
How to get started:
- Create a meeting: If you don’t already have a Google Meet account, sign up and create a meeting link before launching a podcast.
- Share the link: Send the meeting details you’re using to your guest(s).
- Record the meeting: Click the “Record” button during the call to capture the audio and video.
- Download the recording: After the session, Google Meet will provide a downloadable recording that you can use for editing.
Google Meet is a great option if you’re looking for a straightforward and reliable tool that integrates with your existing Google account.
It’s not packed with advanced features, but its features go a long way to get the job done for free.
Best way to record a podcast remotely: SquadCast
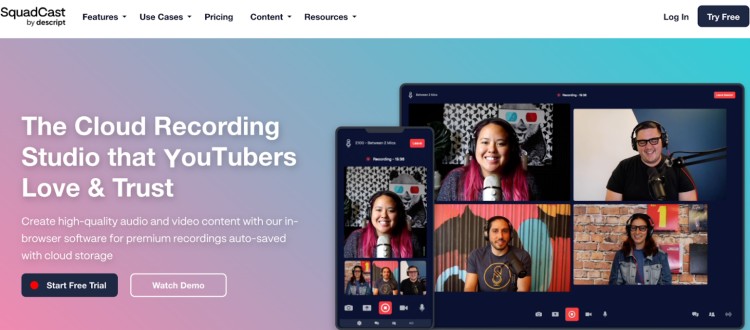
So we’ve covered the easiest way to record a podcast remotely. But what if you want to turn it up a notch?
You’ve got guests lined up, you want high-quality audio and video, and you’re thinking long-term. You want things to run smoothly and sound professional.
If you’re looking for the best quality when it comes to recording a podcast remotely, SquadCast is the standout choice.
Why SquadCast?
- Studio-quality audio: SquadCast records each participant locally, ensuring pristine audio, even if your internet connection isn’t perfect.
- Easy to use: It’s straightforward and intuitive, even for those who aren’t super tech-savvy. You’re able to record with just a few clicks.
- Automatic file upload: No need to manually download and upload files. SquadCast automatically saves and uploads your recording to the cloud, making post-production a breeze.
- Video recording: You can record video alongside audio, which is perfect if you’re creating a show for both audio and visual platforms (like YouTube).
- Guest-friendly: Guests don’t need to download any podcast recording software. They simply click on a link to join your session.
How to get started:
- Sign Up: Create an account on SquadCast’s website. They offer both free and paid plans, but the free version has plenty of features to get started.
- Schedule a recording: Share your recording link with your guest, just like Zoom, and make sure everyone has their equipment ready.
- Choose your settings: Set up your podcast microphone, camera, and any other preferences in the SquadCast dashboard.
- Record: Click record when you’re ready. SquadCast records locally, ensuring your audio is of the highest quality, even if your internet drops.
- Download and edit: After the session, download your recordings. The files will be separated by participant, making it easy to edit.
SquadCast makes the remote podcasting experience feel seamless, ensuring your podcast sounds as professional as possible without all the complicated remote podcast recording software setups.
How to start a podcast remotely fast: Riverside
If you want pro-level audio and video without spending hours figuring out complicated software just to start a podcast, Riverside is built for speed.
Everything runs in the browser, guests join with one link, and you get studio-quality files even if someone’s Wi-Fi dips.
Why Riverside?
- High-quality recording: Capture up to 4K video and 48kHz audio. Riverside records locally on each device, so your files stay clean even during internet hiccups.
- Separate tracks for every guest: Each participant gets their own audio and video file, making editing smoother and more precise.
- Guest-friendly experience: You can invite up to 9 guests with a simple link and hit record.
- Mobile recording on the go: Hosts and guests can join from any iPhone, iPad, or Android device with the same high-quality local recording.
- Built-in editing tools: Trim clips, clean up background noise, remove filler words, generate captions, add b-roll, and polish your video all inside Riverside.
- Producer mode: Bring in a producer to monitor levels, manage guests, and handle the tech behind the scenes without appearing on camera.
How to get started:
- Create a studio: Sign up for Riverside (free plan available) and set up a recording studio for your podcast.
- Invite guests: Share your studio link with up to 9 people. They join directly from their browser
- Record your episode: Hit record. Riverside captures each person’s audio and video locally for maximum quality.
- Edit inside Riverside: Use the built-in editor to trim mistakes, clean up audio, add captions, or create video layouts.
- Download or publish: Export raw WAV/MP4 files or publish your episode via the Spotify for Creators integration.
Riverside is ideal if you want to start your remote podcast quickly but still care about looking and sounding polished.
It cuts out technical headaches and gives you production-level files right out of the gate.
How to Record a Podcast With Someone Remotely
Recording a one-on-one remote podcast is about creating a smooth, natural convo without all the random Wifi interruptions, awkward lags, and “Sorry, can you hear me?” from your guests.
Here’s how to keep it crisp and connected:
- Use a platform with local recording. Go with Cleanfeed. This records each person’s audio separately on their own device, so you’re not stuck with glitchy Zoom audio.
- Agree on gear basics upfront. At minimum: headphones (to stop echo) and a decent mic. Don’t assume they’ll know. Send a quick checklist.
- Do a five-minute pre-chat. Before hitting record, break the ice. Make sure they’re comfortable, and check sound quality without making it weird.
- Keep eye contact. Turn on video even if it’s an audio-only podcast. Seeing each other’s reactions makes for a smoother flow and fewer awkward silences.
- Clap (literally) at the start. If you’re recording separate tracks, a clap helps you sync the audio later. Old-school, but effective.
- Have a post-show moment. After you stop recording, thank your guest and offer to send them a promo graphic. It builds trust and encourages sharing.
How to record a podcast with two hosts remotely
Two hosts, two locations, one show. You have to nail chemistry without being in the same room.
Here’s how to keep the energy tight and the workflow smooth when recording a podcast:
- Choose a platform that supports multitrack recording. Use Riverside. You’ll want separate audio files for each host for easier editing.
- Use real-time communication tools. Have a private Slack channel, WhatsApp thread, or even a shared Google Doc open during the recording. Helpful for cues or passing the mic subtly.
- Do a quick sync call before every episode. 10 minutes to check in, run through the outline, and clarify who’s leading each segment. It’ll make your actual recording feel effortless.
- Use a shared episode structure. Decide ahead: Who introduces the guest? Who leads which questions? Who wraps up? Don’t wing it; it kills the rhythm.
- Embrace the edit. Leave natural pauses so you can remove crosstalk or awkward overlaps. Editing is your best friend with multiple hosts.
Best way to record a podcast from two locations
Recording across two locations doesn’t have to sound like two different planets. With the right setup and a few simple tweaks, you can make it feel like you’re in the same room.
Here’s how:
- Use a platform that records local audio: Resonate Recordings or Streamlabs Talk Studio to record each speaker locally, then sync the files. That’s how you get that “same-room” sound.
- Match your mic setup: If one of you has a $300 mic and the other’s on AirPods, it’ll sound jarring. Stick to the same mic model if you can (e.g., Shure MV7s or Samson Q2Us).
- Record in similar spaces: Soft rooms, minimal echo. You in a closet and your co-host in a tiled bathroom? That contrast will show.
- Keep your cameras on (even for audio): It’s easier to keep the rhythm of a conversation when you can see each other nodding or reacting. Helps with timing too.
- Record an intro and outro separately: Sync your messaging by recording your episode bookends together or solo, just not live on the interview.
How to record a podcast from different locations
So you and your guest (or co-host) aren’t in the same room. No big deal. Recording across locations is more doable than ever.
- Pick a cloud-based recording tool: Use something like Cast or StreamYard that lets you record high-quality audio/video directly from the browser.
- Wear headphones always: Avoid echo and feedback by making headphones non-negotiable for everyone on the call.
- Coordinate time zones upfront: Use tools like World Time Buddy or SavvyCal. Saves you from awkward “wait… what time is it there?” DMs.
- Test your internet before hitting record: You want at least 5 Mbps upload speed per person. Anything less, and someone’s face will freeze mid-sentence.
- Have a backup recorder running: Use Voice Memos on your phone or QuickTime on your laptop. The cloud can fail you. Your backups won’t.
How to Record a Podcast on Your Phone
No fancy studio? No problem. Using your phone to record a podcast can be a solid backup (or even your main rig) if you know how to use it right.
- Download a high-quality podcast recording app: Use something like Dolby On (Android + iOS) or Ferrite (iOS) to record your phone call. They’re built to clean up audio as you go.
- Plug in a mic if possible: Use a lavalier mic that connects to your phone’s jack or port. Even a cheap $20 mic beats your phone’s built-in.
- Find a quiet, soft space: Car with the engine off? Surprisingly great. Hotel room with curtains? Perfect. Avoid empty kitchens and tiled bathrooms.
- Hold it steady or clip the mic: Don’t wave the phone like you’re FaceTiming. Keep the mic stable and at a consistent distance from your mouth.
- Upload to the cloud immediately: Back up to your iCloud or email the file to yourself. Your phone memory fills up faster than you think.
How to Record a Video Podcast Remotely
When video enters the chat, things shift. It’s not just how you sound, but how you look and connect on camera.
Here’s how to make it look polished without a studio:
- Use platforms that offer high-quality video recording. Alitu and Hindenburg both record local video in HD/4K. Avoid relying on Zoom if you care about crisp footage.
- Light your face, not the room. Natural light from a window works. Traveling? Use a small ring light. Home setup? Go softbox. Never record in a dark room.
- Frame it right. Position the camera at eye level. Avoid weird angles. Keep your background clean and distraction-free.
- Look into the lens when speaking. It makes the viewer feel like you’re talking to them, not just your co-host or guest.
- Record some visual extras. Film a short “Welcome to the show” intro separately, or add an end-screen for YouTube. This gives it a polished, branded feel.
Best way to record a video podcast remotely
Want pro-level results with minimal effort? Here’s how to get broadcast-quality video podcast recordings without a crew or fancy setup.
- Use Boomcaster for studio-quality results. It records separate HD video and audio locally for every participant, no internet lag baked in. I would recommend you use software that gives you separate tracks for each person, so you have a local recording of each participant for the best quality audio and video.
- Upgrade your webcam setup. Your laptop cam isn’t the highest quality option. Try a Logitech Brio or repurpose a DSLR with a capture card for 4K clarity instead.
- Get clean audio to match. Use a USB mic like the Elgato Wave3, or a lapel mic if you’re traveling. Don’t rely on built-in mics. They pick up everything.
- Edit with podcast-specific tools. Use Otter.ai to cut out filler words, add captions, and burn in your logo. Bonus: It transcribes your whole episode automatically.
- Batch-record for consistency. If you’re on a roll, do two to three episodes in one day. It keeps your lighting and setup consistent and saves mental energy.
How to record a podcast with remote guests
Interviewing guests remotely is easier than ever, but if you want it to sound professional and run smoothly, prep is everything.
- Send a simple prep email: Include tips like “Wear headphones,” “Sit in a quiet room,” and “Restart your computer.” Prep saves time and nerves.
- Use an easy, browser-based tool: Guests don’t want to download stuff. Stick with Podbean or Camtasia, just click and go.
- Do a quick tech check before recording: Take two minutes to test their mic, adjust levels, and check for background noise to save hours on editing later.
- Ask them to mute notifications: Slack pings, calendar alerts, email dings. All of it needs to go. A quick reminder works wonders.
- Make it easy to share after: Send them a short link, a graphic, and a quote after the episode drops. The easier it is to share, the more reach you get.
How to record remote podcast interviews with video for free
If you want to record video interviews without adding another subscription to your life, these free platforms get the job done and keep things simple for your guests too.
- Jitsi Meet: Open-source, free, and quick to launch. It records group video calls and saves files locally, so the quality holds up even when someone’s Wi-Fi dips.
- Zoho Meeting: A clean, browser-based option with free video meeting recording. Guests join through a simple link, and you get both audio and video files you can download right after the session.
- FreeConferenceCall.com: Reliable video + audio recording in one place. Great for panel-style interviews since it supports large groups at no cost.
- OBS Studio with StreamYard (Free Plan): Use StreamYard to host your guest and OBS to locally capture high-quality video for each side. A slightly more hands-on setup, but the end result looks far more “studio” than “free.”
- Veed.io (Free Recording Tool): Their browser recorder lets you capture split-screen interviews, export MP4 files, and lightly edit your video without paying for upgrades.
Tips and Best Practices for Better Remote Podcast Recording
Want to cut down your editing time and turn up your sound for maximum impact? These small habits make a huge difference when recording remotely.
- Record locally where possible: Platforms like Spotify for Podcasters or OpenReel record straight from each device. That way, dodgy Wi-Fi doesn’t mess with the audio.
- Use a pop filter or foam cover: Cuts out harsh plosives (“P” sounds). Makes your voice sound more polished instantly.
- Do a 30-second mic check: No matter how many times you’ve recorded, test your gear before every session. Don’t assume it’s fine once you find podcast guests.
- Mute yourself when you’re not speaking: Especially in multi-person recordings. This cuts background noise and keeps the focus on the speaker.
- Name your files clearly: Use “Liam_Intro.wav” instead of “Final_final_EDIT_v2.wav.” Your editor (or your future self) will thank you.
- Stay cool when things go wrong: Guests will forget their headphones. Platforms will crash. Always have a plan B. Zoom, QuickTime, or even a phone call backup.
5 Common mistakes to avoid when recording podcasts remotely
Recording remotely comes with its own set of surprises, even if you’ve got the basics down. Avoid these common pitfalls to keep your episodes professional and your guests happy:
- Overloading your guest with tech: Asking your guest to install multiple tools, plugins, or audio interfaces can create anxiety before they even say “hello.” Keep it simple: one link, one platform, one quick setup guide.
- Recording blind: Not monitoring live audio means you won’t catch echo, clipping, or mic placement issues until post-production, costing hours in editing.
- Overestimating your energy reserves: Remote recordings can drag longer than expected, especially with time zone misalignment. Fatigue shows in tone and engagement, so schedule breaks or shorter sessions.
- Skipping rehearsal for complex formats: Multi-host panels, interactive Q&As, or video overlays require dry runs. Without rehearsals, even minor misalignments can break the flow and confuse listeners.
- Overcomplicating guest roles: Asking a guest to handle slides, visuals, or live polls while talking can overwhelm them. Keep their job simple: speak, share insight, and show off what they’ve got.
Podcast time limit: What’s too long to record podcasts remotely?
How long should your podcast be? There’s no one-size-fits-all answer. But there is a sweet spot, and it depends on your format, audience, and goals.
- Know your audience’s routine: If your audience listens during a commute or workout, keep it under 30 minutes. If they prefer deep dives, 45-60 minutes might be your zone.
- Let the content lead: Got 15 minutes of solid gold? Stop there. No need to stretch an episode just to hit a target.
- Cut the fluff: Listeners will bail if the intro rambles or the conversation drags. Tight editing makes even long episodes feel short.
- Check your drop-off rates: Use analytics tools (Spotify, Apple, or your host) to see where people stop listening and adjust accordingly.
- Test and learn: Try short-form one week and longer episodes the next. See what gets replayed, shared, and finished.
Wait! Don’t Forget Your FREE Remote Podcast Equipment Checklist
Want a quick and easy list for your podcast equipment bundle? Here’s exactly what you need to record a podcast remotely without sacrificing quality.
☐ Microphone: Go for a USB mic like the Samson Q2U or Rode NT-USB. Easy plug-and-play setup. (Here’s where you can find the best podcast microphones.)
☐ Headphones: Sennheiser HD 598 S or any closed-back headphones that don’t bleed sound.
☐ Laptop or desktop: Avoid using a tablet or phone as your main recording device.
☐ Recording platform: Choose a browser-based tool like Tryca.st or Soundtrap for clean, separate audio tracks.
☐ Quiet recording space: No barking dogs, no echoey kitchen tiles. Use rugs, curtains, or pillows to soften sound.
☐ Pop filter or foam cover: These help reduce plosives and harsh “P” sounds. Small fix, big upgrade.
☐ Cloud storage: Use OneDrive or Frame.io to organize and share your raw files easily.
☐ Lighting (for video): A simple ring light helps your video recordings look polished without much setup.
What You Need to Record a Podcast Remotely
Before you hit record, make sure you have the right setup. You don’t need a full studio, but you do need a few basics to sound legit and pleasant to your target audience.
- Pick a cloud-based recording tool: Use something like Podcastle or Adobe Podcasts that lets you record high-quality audio/video directly from the browser. No installs. No hassle.
- Use a good mic (not your laptop): A USB mic like the Samson Q2U or Shure MV7 makes a massive difference.
- Wear headphones: Avoid echo and feedback. Even basic wired earbuds work.
- Find a quiet space: Record in a carpeted room, closet, or anywhere that softens sound. Blankets and curtains help too.
- Check your internet speed: A strong, stable connection means fewer glitches. Use Ethernet if possible.
Record Remotely, Reach Globally
Record remotely. Reach anyone. Sound amazing.
You’ve got the mic, the guest, and the checklist on how to record a podcast remotely. But here’s the reality: if no one’s listening, none of it counts.
Talks makes sure they do. With a free Talks Creator profile, you can:
- Show off a speaker page that auto-updates and ranks high on Google.
- Get auto-matched with podcasters actively looking for voices like yours.
- Send authentic, personalized pitches in seconds (goodbye, email tennis!!).
- Book interviews and record smoothly without a million different steps.
Stop letting your best content sit in your drafts. Join our growing Talks community today and start recording with the guests who can take your podcast global.
Yes! Give Me My FREE Talks Profile Now!
, Tips, Ideas + Guide 2026")
, Examples + Guide 2026")
 + Free Intro Generator 2026")